In the following Article we will learn, how to edit the description attribute of an computer object in active directory, while deploying the client. The following Script also detects the serial number of the client, on which the script is executed. The serial number is than added to the description attribute of the computer object.
Steps
Prepare the Powershell Script
The following – fairly simple – Powershell Script can be edited so it meets your requirements.
In general you just have to edit the variable „$VAR_Description“, so that the string matches your needs for your new deployed clients.
# Script sets the Description in AD for the computer object on which it is executed from.

#Set Variables
$VAR_SerialNumber = (Get-WmiObject -class win32_bios).SerialNumber
$VAR_Description = "Win 10 Pro x64 - Hardware Model XYZ - SN: $VAR_SerialNumber"

try {
	$ComputerDn = ([ADSISEARCHER]"sAMAccountName=$($env:COMPUTERNAME)$").FindOne().Path
	$ADComputer = [ADSI]$ComputerDn
	$ADComputer.description = $VAR_Description
	$ADComputer.SetInfo()
}
catch {
	$_.Exception.Message ; Exit 1
}
The Script is inspired by Jörgen Nilsson.
Set Permissions in AD for Service User to Edit Computer Description
To be able to edit the description attribute for your desired computer objects you need a user who is able to perform these operations in your domain. The best solution is, to use a dedicated service user, who only have these permissions, to edit the description attribute. I assume that you already have this kind of service user in your domain. In the following screenshots you can see how to grant the required permissions to your service user in your domain.
- Open your ADUC Console and navigate to your desired OU, under which the service user should be able to edit the description attribute in the future. In my case its the OU „CLT“
- Right Click on your desired OU (1) > Choose „Properties“ > Go to „Security“ > Go To „Advanced“ (2)
- Select your desired service user (3)
- Change „Applies to“ to „Descendant Computer objects“ (4)
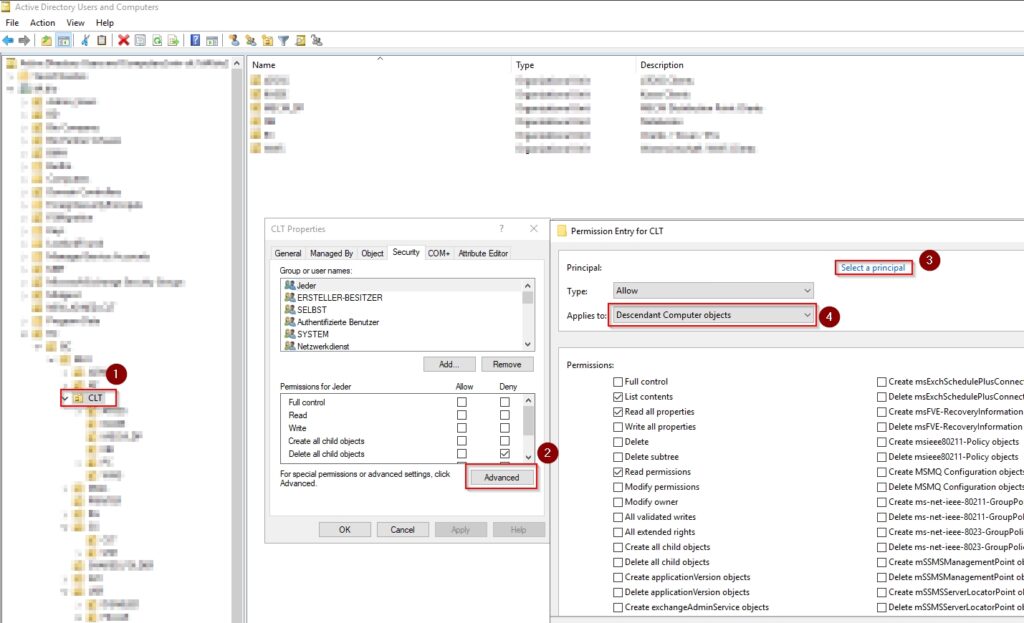
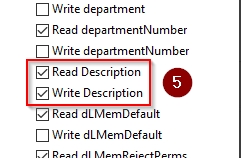
- Scroll down under „Permiossions“ until you see the Settings „Read Description“ and „Write Description“ and select these to options (5)
- Save the new permissions „OK“
Add Script to ConfigMgr Task Sequence
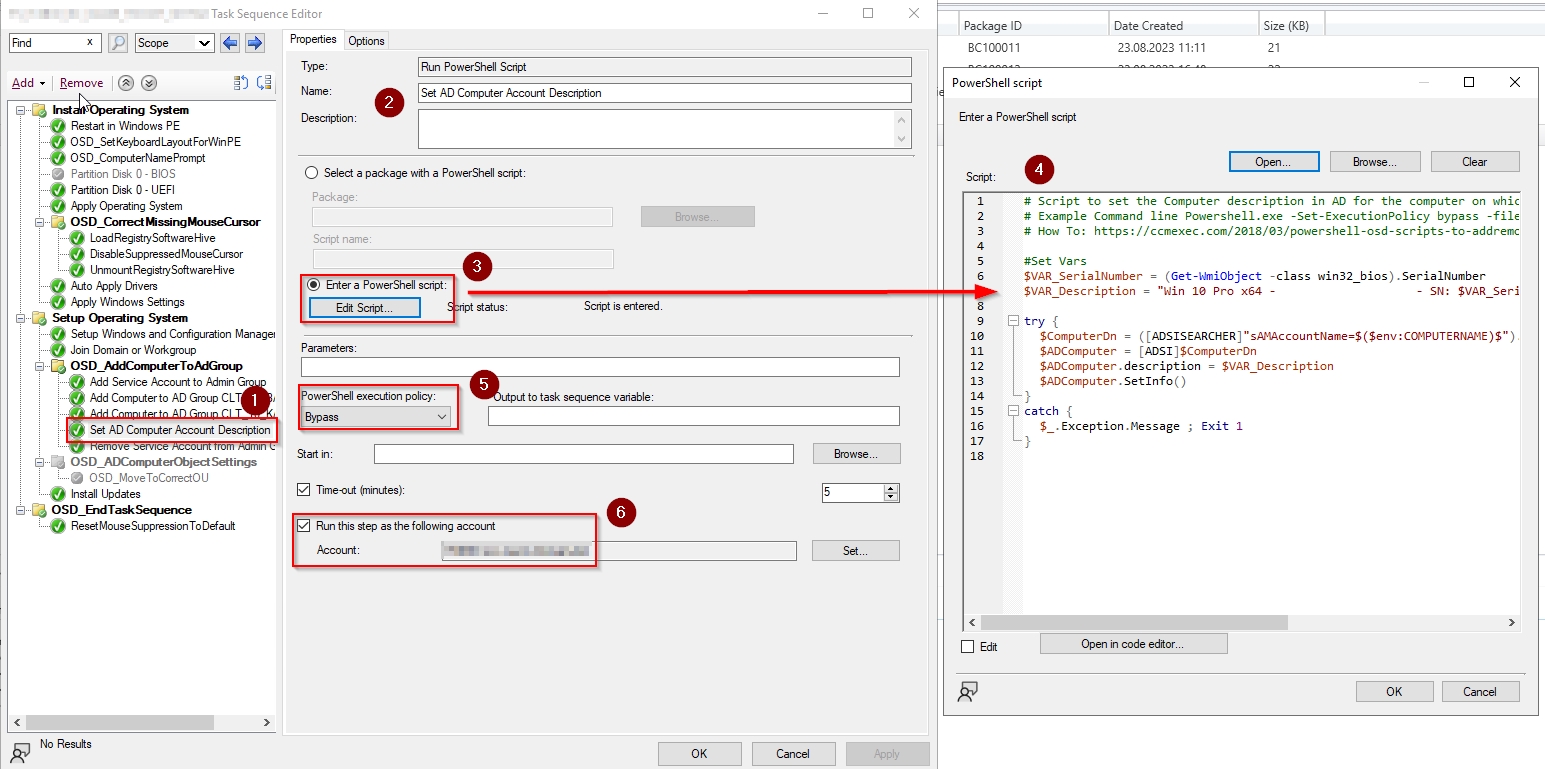
In the next step we will add the previously created PowerShell Script to our desired task sequence – so go ahead to your MECM Console and edit the Task Sequence you want to add this step. As the PowerShell Script is fairly simple, we do not create a package to deploy the certificate, but rather create a „Run PowerShell Script“ step in our task sequence and enter the script directly into it.
- Add a new Step to your task sequence. Type = Run PowerShell Script (1)
- Add a name and description which matches your standards (2)
- Select „Enter a PowerShell Script“ > Click on „Edit Script“ (3)
- Add the previously created PowerShell Script and confirm with a click on „OK“ (4)
- Set the PowerShell execution policy to „bypass“ (5)
- Select „Run this step as the following account“ and set your previously created or entitled service user (6)
[…]